By JW Tool Box
How to Convert HEIC to JPG Directly on iPhone (and PC/Mac)
Why trust this guide
- Written by JW Tool Box around the actual workflow or linked tool on this page.
- Updated when browser behavior, file handling, or platform dimensions change in ways that affect the steps.
- Focused on practical settings, safe defaults, and real tradeoffs instead of generic filler.
If you use an iPhone, you've probably encountered the HEIC format. You take a photo, try to upload it to a website or send it to a Windows PC, and suddenly it's unreadable. "File format not supported" is a frustrating error message.
While HEIC (High Efficiency Image Container) is great for saving space on your phone, it's terrible for compatibility. Here is how to convert your HEIC photos to the universal JPG format.
What is HEIC and Why Does Apple Use It?
Apple switched to HEIC in iOS 11. It uses modern compression methods to keep photos looking great while taking up about half the space of a standard JPG. That's why your iPhone storage doesn't fill up as fast.
The Problem: Windows, older Android phones, and many web forms (like government sites or job applications) often don't accept HEIC files.
Method 1: Use a Free Online Converter (Easiest)
The fastest way to convert a file without installing apps is to use a browser-based tool. This works on your iPhone (in Safari/Chrome), Mac, or PC.
- Open the HEIC to JPG Converter.
- Tap "Select File" and choose the photo from your library.
- The tool will instantly process the image.
- Download the converted JPG file.
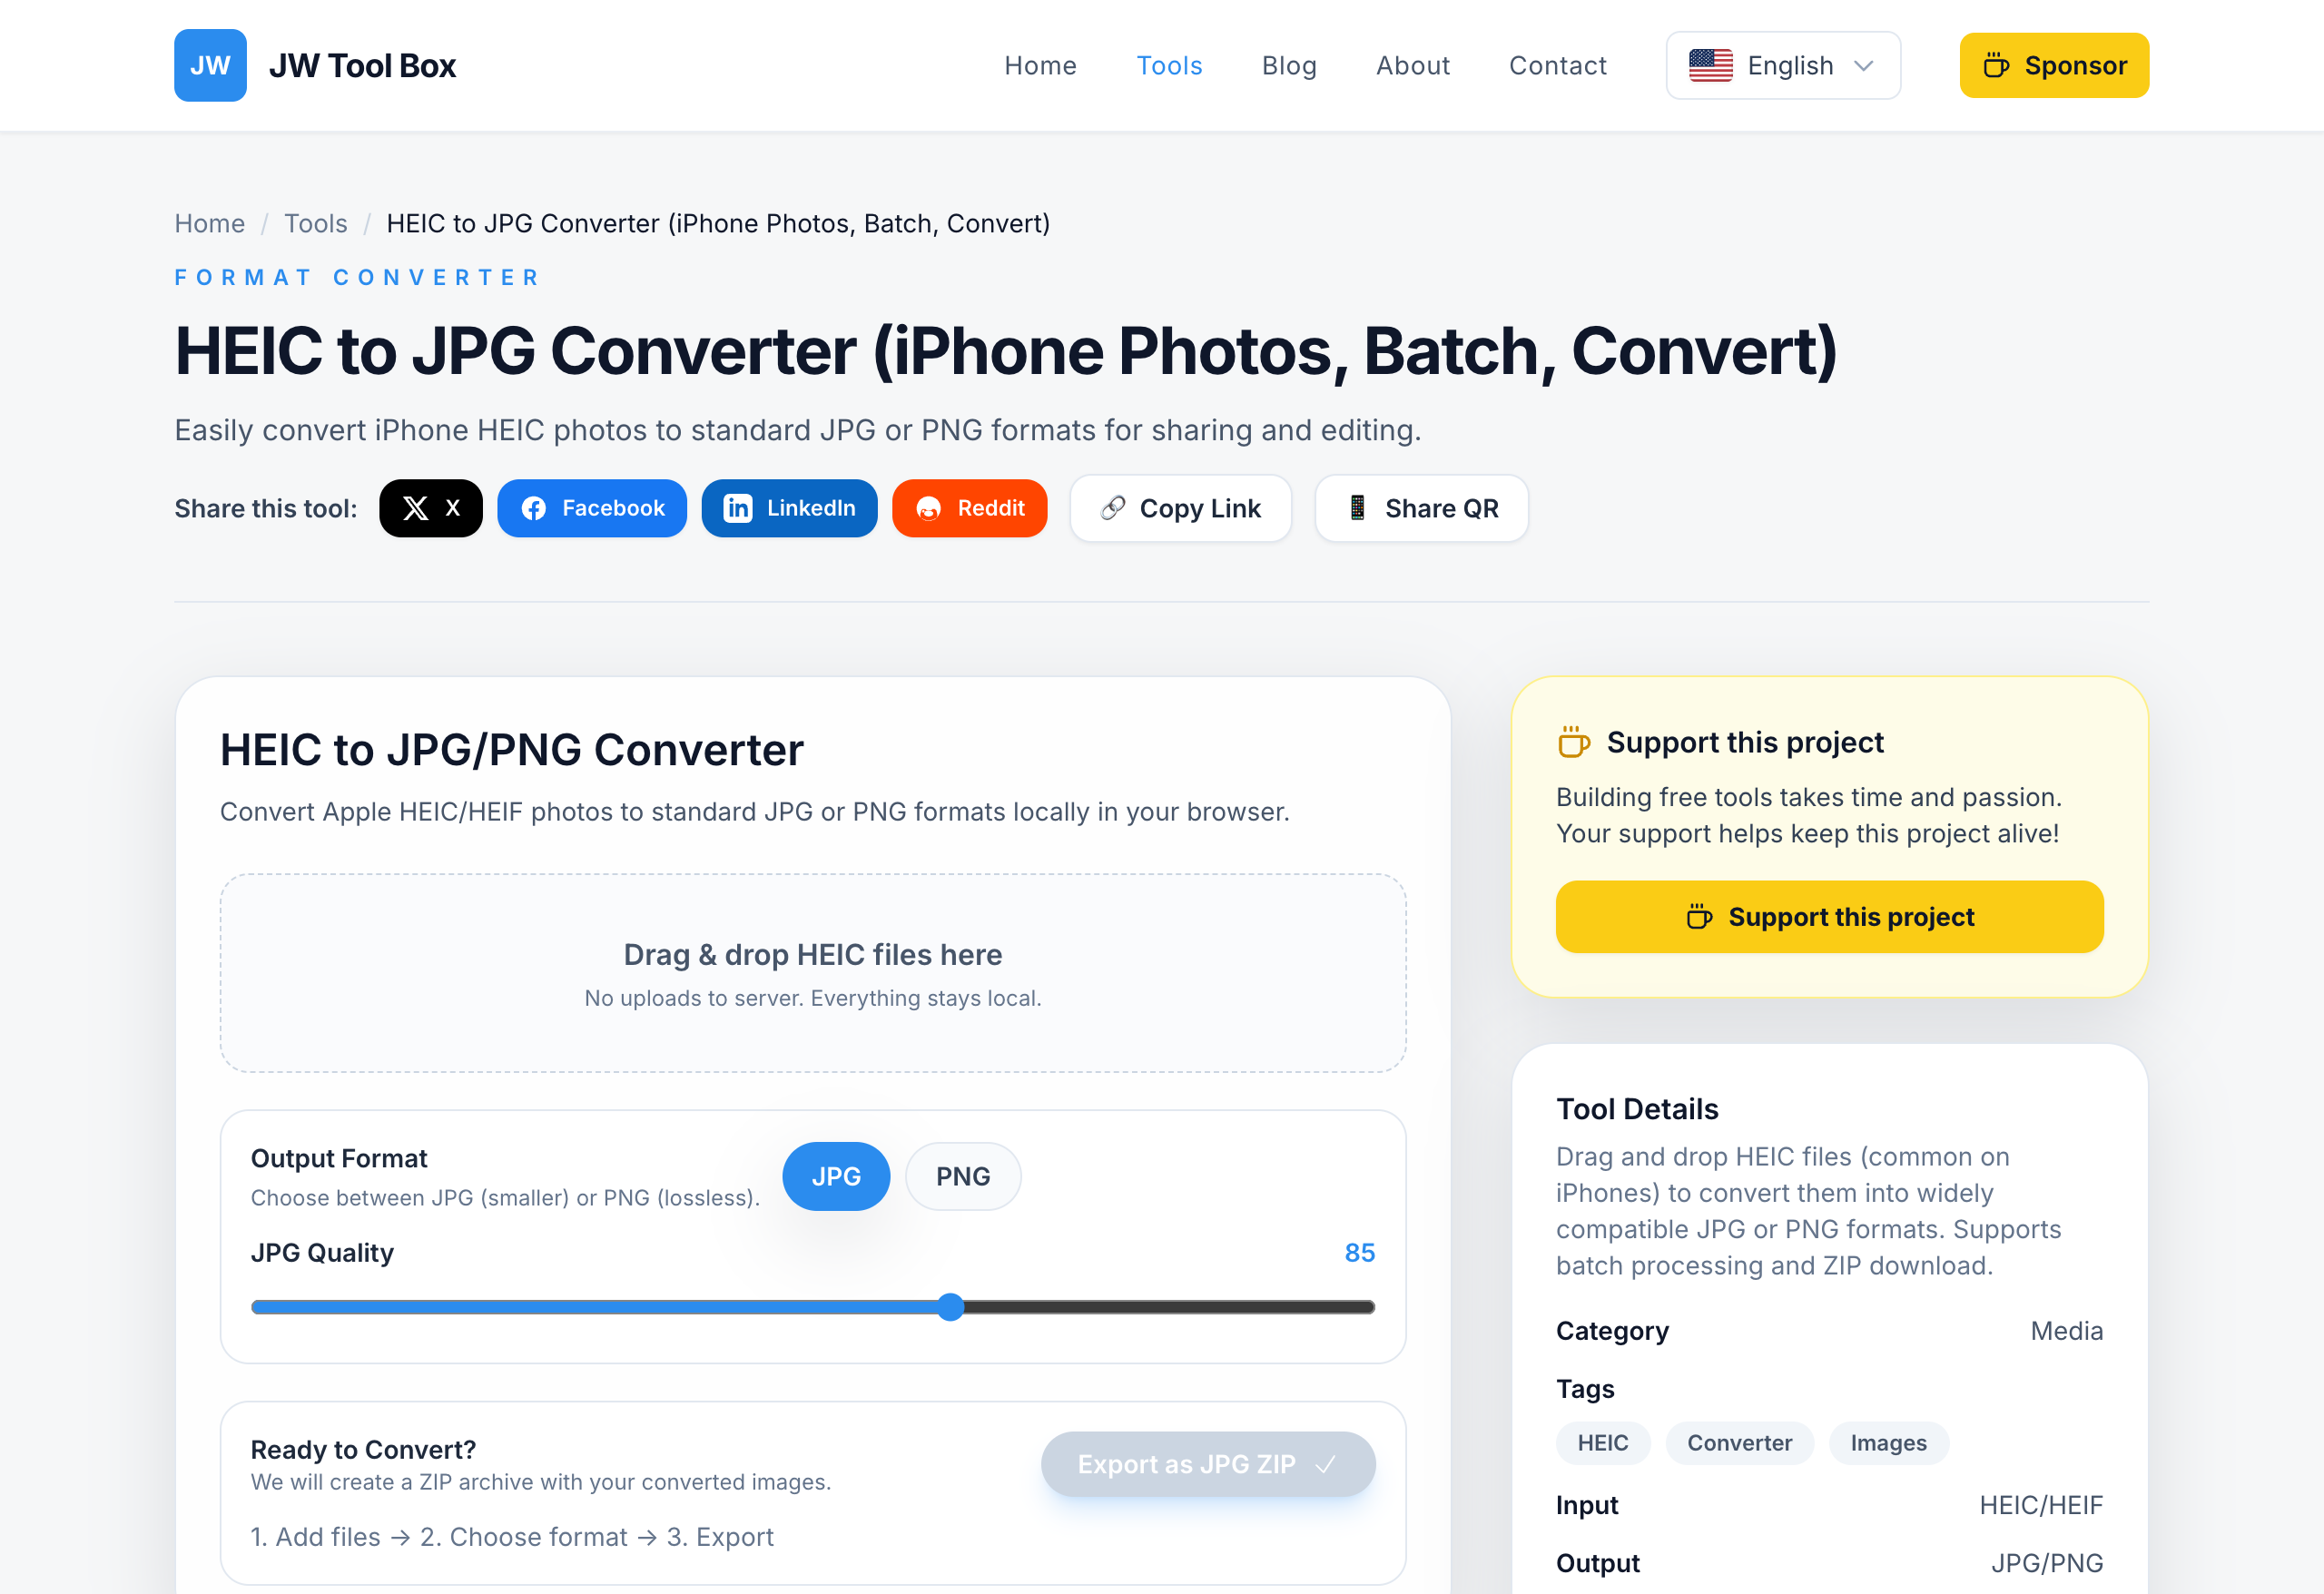
This is safer than many "free app" downloads because the conversion happens locally in your browser—your photos aren't uploaded to a remote server where they could be stored.
Method 2: Change iPhone Settings (Permanent Fix)
If you are tired of converting files and just want your iPhone to save JPGs by default:
- Go to Settings > Camera.
- Tap Formats.
- Change the selection from "High Efficiency" to "Most Compatible".
Note: This will make your future photos take up more storage space.
Method 3: Automatic Conversion When Transferring
Your iPhone is actually smart enough to convert files when you plug it into a computer, but you have to check the setting:
- Go to Settings > Photos.
- Scroll to the bottom section "Transfer to Mac or PC".
- Select "Automatic".
Now, when you copy photos via USB, they should arrive as JPGs. But for emailing or uploading to websites directly from your phone, Method 1 is still your best bet.
About the author
JW Tool Box - Editorial and product review team
JW Tool Box publishes hands-on guides tied directly to the site's browser-based tools. Content is updated when browser behavior, platform rules, or product requirements change in ways that affect real workflows. The goal is to provide practical instructions, tested defaults, and trustworthy reference content instead of thin keyword filler.
Related guides
-
How to Batch Convert HEIC to JPG Locally on Mac or PC (Zero Uploads)
If you own an iPhone or an iPad, you've inevitably run into the "HEIC problem." You try to upload a photo to a website, attach it to a Windows email client, or submit it to a government portal, and you get hit with an Invalid File Format error. To fix this, most people instinctively Google "convert HEIC to JPG" and click the first result. Here is why that is a terrible idea for your privacy. M…
-
Batch Convert HEIC to JPG Free (No Upload) | 2026 Guide
If you've recently tried to upload an iPhone photo to a job application, a government portal, or even just a school submission system like Canvas, you've probably hit a wall. iPhones use the HEIC format by default because it saves roughly 50% more storage than JPG at the same quality. The frustrating reality in 2026? Windows, most Android devices out of the box, and countless legacy web forms…
Related tools
Additional browser-based utilities that are closely related to this workflow.
-
Batch Convert HEIC to JPG — Free iPhone Photo Converter
Batch convert HEIC to JPG or PNG instantly in your browser. No upload, no file limits.